What are the differences between angular contact ball bearings and deep groove ball bearings?

Angular contact ball bearings and deep groove ball bearings are two common types of ball bearings used in various applications. While both types serve the purpose of reducing friction between moving parts and supporting radial and axial loads, they have distinct differences in design, capabilities, and applications.

Angular contact ball bearings and deep groove ball bearings

Spindle Bearings

Design Differences

Contact Angle:

Angular Contact Ball Bearings: These bearings have a contact angle, typically between 15° and 40°. The contact angle allows them to support significant axial loads in one direction.

Deep Groove Ball Bearings: These bearings have a very small or zero contact angle, which enables them to support moderate axial loads in both directions along with radial loads.

Raceway Design:

Angular Contact Ball Bearings: The raceways of the inner and outer rings are offset from each other, which creates the contact angle.

Deep Groove Ball Bearings: The raceways are designed with deep grooves that enable the bearing to support radial loads and moderate axial loads.

Load Handling Capacity:

Angular Contact Ball Bearings: Can handle higher axial loads in one direction due to the contact angle. They can also handle combined loads (radial and axial) but are less efficient in handling purely radial loads compared to deep groove bearings.

Deep Groove Ball Bearings: Primarily designed to handle radial loads but can also accommodate moderate axial loads in both directions due to the deep grooves.

Performance Differences

Axial Load Capacity:

Angular Contact Ball Bearings: Superior in handling axial loads in one direction due to the contact angle.

Deep Groove Ball Bearings: Can handle axial loads in both directions, but the capacity is typically lower compared to angular contact bearings.

Radial Load Capacity:

Angular Contact Ball Bearings: Less efficient in handling purely radial loads compared to deep groove bearings.

Deep Groove Ball Bearings: Highly efficient in handling radial loads due to the deep groove design.

For more detailed information on the differences between angular contact ball bearings and deep groove ball bearings, please click here: https://www.lkwebearing.com/news-center/angular-contact-ball-bearings-and-deep-groove-ball-bearings.html

What to do if the vibrating feeder unloads slowly

vibrating feeder that unloads slowly can be problematic for many operations, as it can hinder productivity and efficiency. Here are several potential reasons and corresponding troubleshooting steps to address the issue:

Potential Causes and Solutions

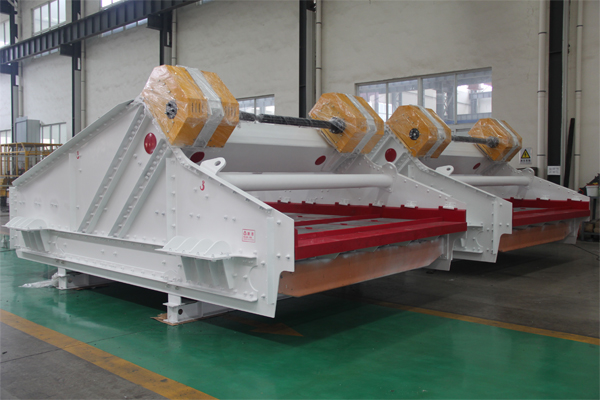
HVF feeder

Improper Feeder Settings

Amplitude and Frequency: Ensure that the amplitude and frequency settings of the vibrating feeder are set correctly according to the material being processed. Increasing the amplitude might help if the material is not flowing adequately.

Angle of Incline: The feeder should be positioned at an optimal incline angle. Adjusting the angle may improve the flow rate of the material.

Material Properties

Material Flow Characteristics: Some materials are inherently difficult to move due to their cohesiveness, stickiness, or particle size. Ensuring the material is free-flowing and not bridging or clumping can help.

Moisture Content: High moisture content can cause materials to stick together, reducing flow. Reducing moisture content or using dehumidifiers can mitigate this issue.

Feeder Design Issues

Feeder Tray Design: The design of the feeder tray should match the material properties. For example, certain materials may require a steeper tray or a different surface finish to improve flow.

Obstructions and Blockages: Ensure that there are no obstructions or blockages in the feeder tray. Regular cleaning and maintenance can prevent build-up that could hinder performance.

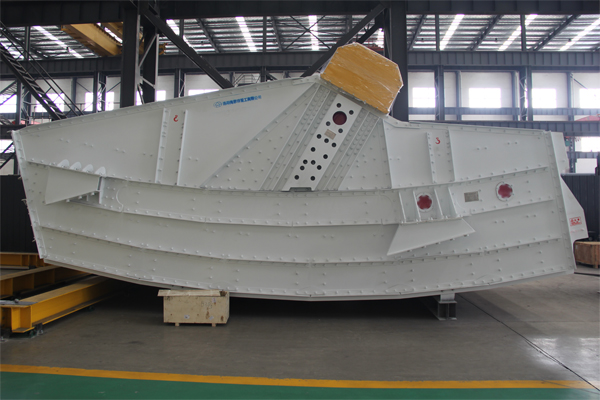
HSV feeder

Mechanical Problems

Worn Out Parts: Components such as springs, bearings, or motors may wear out over time, reducing the efficiency of the feeder. Regular inspection and replacement of worn parts can maintain optimal performance.

Alignment Issues: Misalignment of the feeder components can cause inefficiencies. Ensuring proper alignment and securing of all parts can help.

Electrical Issues

Power Supply: Check the power supply to the vibrating feeder. Inadequate or fluctuating power can cause the feeder to operate inefficiently.

For more detailed information about the reasons why vibrating feeder unloading is slow, please click to visit: https://www.hsd-industry.com/news/vibrating-feeder-unloading-is-slow/

Steel Office Desk: Technical Specifications and Considerations

Steel office desks are an integral part of modern office furniture, known for their durability, strength, and sleek appearance. They are designed to meet the demands of various work environments, from corporate offices to industrial settings. This article delves into the technical aspects of steel office desks, covering their material properties, construction methods, ergonomic considerations, and maintenance requirements.

Material Properties

Steel Office Desk

Steel Composition

Steel used in office desks typically consists of iron alloyed with carbon and other elements to enhance its strength and durability. The common types of steel used include:

Carbon Steel: Contains carbon as the main alloying element. It is robust and cost-effective, suitable for most office applications.

Stainless Steel: Contains chromium, which provides corrosion resistance. It is ideal for environments where the desk might be exposed to moisture or chemicals.

Galvanized Steel: Coated with a layer of zinc to prevent rusting. This type is particularly useful in industrial settings.

Mechanical Properties

Steel desks are chosen for their superior mechanical properties, including:

Tensile Strength: Steel has a high tensile strength, making it capable of withstanding heavy loads without deforming.

Durability: The material is resistant to wear and tear, ensuring a long lifespan even under constant use.

Flexibility: Despite its strength, steel can be formed into various shapes, allowing for versatile desk designs.

Construction Methods

Fabrication Techniques

The construction of steel office desks involves several key fabrication techniques:

Cutting: Steel sheets are cut to size using laser cutting, plasma cutting, or shearing.

Bending: Machines like press brakes are used to bend steel sheets into the desired shapes for desk components.

For more detailed information about the technical specifications of steel desks, please click here: https://www.cydfurniture.com/en/a/news/technical-specifications-and-considerations.html

What is a glass tempering furnace?

Glass tempering furnaces are essential in the glass manufacturing industry, enabling the production of tempered glass, which is significantly stronger than regular annealed glass. This article explores the technical aspects of glass tempering furnaces, including their design, operation, types, and maintenance.

Principles of Glass Tempering

Glass tempering involves heating glass to a temperature just below its melting point (approximately 600-650°C) and then rapidly cooling it. This process induces compressive stresses on the surface and tensile stresses inside, resulting in increased strength and improved safety characteristics. Tempered glass shatters into small, blunt pieces rather than sharp shards.

Components of a Glass Tempering Furnace

glass tempering furnace

Heating Section

Heating Elements: Typically made from high-resistance alloys such as Kanthal (FeCrAl) or Nickel-Chromium (NiCr) alloys. These elements provide consistent and uniform heating.

Insulation: High-quality refractory materials like ceramic fiber boards or alumina-silicate bricks are used to insulate the furnace, reducing heat loss and improving energy efficiency.

Temperature Control: Advanced control systems, often employing thermocouples and infrared sensors, ensure precise temperature regulation throughout the heating chamber.

Quenching Section

Air Blowers: Powerful fans generate high-pressure air streams for rapid cooling. The airflow must be uniform and controllable to achieve the desired stress profile in the glass.

Nozzles: Specially designed nozzles distribute air evenly across the glass surface. The nozzle arrangement and size are critical for achieving uniform cooling.

Conveyor System

Rollers: Heat-resistant rollers, often made from fused silica or ceramic-coated steel, transport the glass through the furnace. The roller speed is adjustable to control the heating and cooling rates.

Drive Mechanism: Precision motors and drives ensure smooth and consistent movement of glass through the furnace.

Types of Glass Tempering Furnaces

Horizontal Tempering Furnaces

Operation: Glass moves horizontally through the furnace on rollers.

Applications: Suitable for flat glass panels used in windows, doors, and automotive applications.

Advantages: Reduced risk of glass surface damage and higher throughput.

For more detailed information about the introduction of glass tempering furnace e, please click to visit: https://www.shencglass.com/en/a/news/what-is-a-glass-tempering-furnace.html

How does the circular vibrating screen work?

circular vibrating screen operates using a motor to drive an eccentric shaft, which creates a circular motion of the screen. This motion causes the materials on the screen to move in a circular path, facilitating the separation of particles based on size. Here is a step-by-step explanation of how a circular vibrating screen works.

Working principle of circular vibrating screen

circular vibrating screen

Motor and Eccentric Shaft: The operation begins with an electric motor that drives an eccentric shaft. This shaft is not centered, meaning its axis of rotation is offset. As the motor rotates the shaft, the eccentric design causes the shaft to move in a circular motion.

Screen Frame: Attached to the eccentric shaft is a screen frame that holds one or multiple screening surfaces or meshes. As the eccentric shaft rotates, it imparts a circular motion to the screen frame.

Vibration: The circular motion generated by the eccentric shaft creates vibrations in the screen frame. These vibrations are transmitted through the screen surface.

For more detailed information about the working principle of circular vibrating screen, please click to visit: https://www.zexciter.com/en/a/news/working-principle-of-circular-vibrating-screen.html

What is a welding turntable ?

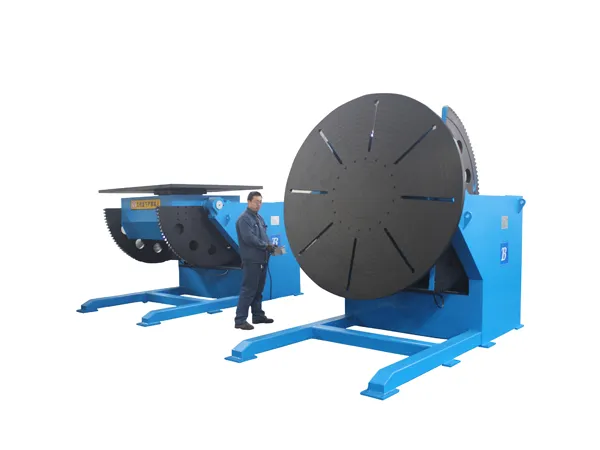
Welding turntable is a special equipment used for welding operations. It can rotate the workpiece at various angles and speeds to facilitate the welder’s welding operations. This equipment is widely used in industries that require precise and efficient welding, such as machine manufacturing, automobile manufacturing, aerospace, petrochemicals, and shipbuilding.

Main components of welding turntable

Base: The base part of the welded turntable that provides stability and support.

Rotary table: a rotatable work table installed on the base and used to fix the workpiece.

Drive system: usually composed of an electric motor and a reducer, responsible for providing rotational power and controlling the speed.

Control system: including electrical control box and operation panel, used to control the rotation speed, angle and direction of the turntable.

Clamp: used to fix the workpiece to keep it stable during the welding process.

Welding turntable

How the welding turntable works

The welding turntable rotates the rotary table through the drive system, and the workpiece is fixed on the rotary table. During the welding operation, the welder or automatic welding equipment can perform welding in a fixed position, and the rotating movement of the turntable ensures that the weld seam is maintained at the optimal welding position and angle.

Clamping the workpiece: The workpiece is fixed on the rotary table by the fixture to ensure that it does not move during the rotation.

Set parameters: Set parameters such as rotation speed, rotation direction and rotation angle through the control system.

Start the equipment: start the welding turntable, and the drive system starts to work, making the turntable and workpiece rotate.

Welding operation: Welders or automatic welding equipment perform welding during the rotation of the workpiece to ensure welding quality and efficiency.

For more detailed information about what a welding turntable is, click to visit: https://www.bota-weld.com/en/a/news/welding-turntable-introduction.html

What are the types of crushers?

Crushers are machines used to reduce the size of rocks, gravel, or other materials in aggregate processing, construction, and mining. Here are the main types of crushers, along with a brief description of each:

Crushers types

Crushers

1. Jaw Crushers

Jaw crushers use a pair of vertical jaws, one stationary and the other moving, to crush materials. The material is fed into the top of the jaws and is compressed as the movable jaw moves towards the stationary jaw, crushing it into smaller pieces. Jaw crushers are commonly used for primary crushing.

2. Gyratory Crushers

Gyratory crushers consist of a concave surface and a conical head; both surfaces are typically lined with manganese steel. The inner cone is slightly eccentric, which allows the gap between it and the concave to change, crushing the material. They are used for primary or secondary crushing of large volumes of hard materials.

3. Cone Crushers

Cone crushers are similar to gyratory crushers in that they use a mantle that gyrates within a concave bowl. Unlike gyratory crushers, cone crushers are more often used in secondary, tertiary, and quaternary crushing stages. The material is crushed by compression between the mantle and the bowl liner.

Crushers

4. Impact Crushers

Impact crushers utilize the impact principle. They come in two main types:

Horizontal Shaft Impact (HSI) Crushers: These use hammers or blow bars attached to a horizontal rotor to crush the material as it strikes a stationary anvil or breaker plates.

Vertical Shaft Impact (VSI) Crushers: These use a high-speed rotor to project material against a wear-resistant anvil or rock shelf, breaking the material along its natural fissures.

More detailed information about crusher types can be accessed by clicking here: https://www.zymining.com/en/a/news/crushers-types.html

Detailed explanation of the installation method of crossed cylindrical roller bearings

Installing crossed cylindrical roller bearings requires precision and careful handling to ensure optimal performance and longevity. Here’s a step-by-step guide on how to properly install these bearings:

The installation method of crossed cylindrical roller bearings

crossed cylindrical roller bearings

Preparation

Cleanliness: Ensure that the bearing, housing, and all related components are clean. Remove any dirt, dust, or debris that could affect the bearing’s performance.

Inspect Components: Check the bearing, housing, and shaft for any signs of damage or wear. Replace any damaged parts before proceeding.

Lubrication: Lubricate the bearing and related components with the appropriate lubricant recommended by the manufacturer.

Installation Process

Aligning the Bearing and Shaft:

Carefully align the bearing with the shaft. Ensure that the bearing’s inner ring fits onto the shaft smoothly.

Use a plastic or rubber mallet to gently tap the bearing into place if necessary. Avoid using excessive force to prevent damage.

Inserting the Bearing:

Place the bearing onto the shaft and ensure that it is seated correctly.

For larger bearings, use a bearing heater to expand the inner ring slightly, allowing for easier installation.

Mounting the Outer Ring:

Align the outer ring with the housing or bearing seat.

Gently tap the outer ring into place using a soft mallet or a press, ensuring even pressure to avoid misalignment.

Securing the Bearing:

Once the bearing is in place, secure it with the appropriate locking mechanism, such as a lock nut, retaining ring, or end cap.

Tighten any screws or bolts to the manufacturer’s recommended torque specifications to prevent over-tightening or under-tightening.

Check Alignment:

Rotate the bearing assembly by hand to check for smooth operation and proper alignment.

Ensure there is no excessive play or binding in the bearing.

Final Lubrication:

Apply additional lubricant if necessary, ensuring that the bearing is adequately lubricated for operation.

Follow the manufacturer’s guidelines for the type and amount of lubricant to use.

Test Run:

Once installed, run the bearing at low speed and check for any abnormal noise, vibration, or heat generation.

Gradually increase the speed to the normal operating level while continuing to monitor the bearing’s performance.

crossed cylindrical roller bearings

Post-Installation

Regular Inspection: Periodically check the bearing for signs of wear, lubrication levels, and overall performance.

Maintenance: Follow the maintenance schedule recommended by the bearing manufacturer to ensure long-term reliability.

For more detailed information about the installation method of crossed cylindrical roller bearings, please click here:https://www.boyingbearing.com/en/a/news/crossed-cylindrical-roller-bearing-installation-method.html

Introduction to mobile aisle shelving system

Mobile aisle shelving systems are an efficient storage solution that are widely used in libraries, archives, warehouses, museums and other fields. This system maximizes space utilization and significantly increases storage density by introducing movable rails and shelving units onto traditional shelving. This article will detail how mobile aisle shelving systems work, their structural components, installation methods, and their benefits.

Working principle

The core concept of a mobile aisle shelving system is to mount multiple shelving units on movable tracks. By manual or motorized means, users can move these shelving units, creating a temporary passage to access desired storage items. In this way, the system only opens channels when needed, thereby converting the space originally used for fixed channels into storage space and improving storage efficiency.

Mobile Aisle Shelving Systems

Structural components

The mobile channel shelving system mainly consists of the following parts:

Track System: Tracks are the foundation of a mobile aisle shelving system and are typically made from high-strength steel. Tracks are installed on the floor to ensure smooth movement of the shelving unit. The design of the track needs to consider the flatness and load-bearing capacity of the ground.

Shelving Unit: A shelving unit is the actual structure for storing items and consists of multiple layers of adjustable shelves and brackets. Shelving unit sizes and materials vary depending on storage needs and environmental conditions.

Drive System:

Manual drive: Uses handles or wheels to push the shelving unit forward. Manual systems are generally suitable for smaller-scale applications.

Electric Drive: Equipped with an electric motor to control the movement of the shelving unit via buttons or touch screen. Motorized systems are suitable for storage environments that require frequent access and larger volumes.

Safety system: including anti-tilting devices, infrared sensors and emergency stop buttons to ensure the safety of people and items during movement.

Installation method

The installation of a mobile aisle shelving system requires professional skills and precise measurements. The main steps are as follows:

Ground preparation: Make sure the ground is flat and has sufficient load-bearing capacity. Perform ground reinforcement or adjustments if necessary.

Install the track: According to the design drawings, accurately position and fix the track. Make sure the tracks are parallel and level to allow for smooth movement of the shelving unit.

Assemble Shelving Units: Assemble shelving units as needed, adjusting shelf heights to accommodate different sized storage items.

Install drive systems and safety devices: Install manual or electric drive systems, set safety devices, and perform testing and commissioning.

System debugging: After installation is complete, conduct a comprehensive test of the entire system to ensure that the shelving units move smoothly and safety devices are working properly.

Mobile Aisle Shelving Systems

Advantage

Mobile aisle shelving systems offer the following significant benefits:

High space utilization: By reducing the number of fixed channels, the storage density is greatly increased and the space utilization efficiency is improved.

For more detailed information about the introduction of mobile aisle shelving system, please click here: https://www.etegreen.com/en/a/news/introduction-to-mobile-aisle-shelving-system.html

What is the correct installation method for machine tool spindle bearings?

The correct installation method for machine tool spindle bearings is critical to ensure precision, performance, and longevity of the machine. Here’s a detailed guide on how to install these bearings correctly.

Preparation

Work Area Cleanliness: Ensure the work area is clean and free from contaminants such as dust, dirt, and metal shavings.

Inspection: Check all components, including the bearings, spindle, and housing, for any signs of damage or wear. Replace any defective parts.

Tools and Equipment: Gather all necessary tools and equipment, such as bearing heaters, clean gloves, soft mallets, and appropriate measuring instruments.

Lubrication

Pre-lubrication: Depending on the type of bearing and manufacturer’s recommendations, pre-lubricate the bearings with the appropriate lubricant. This could be grease or oil.

Heating

Bearing Heating: Use a bearing heater to uniformly heat the bearing to a temperature recommended by the manufacturer, typically between 80°C and 100°C (176°F to 212°F). This allows the bearing to expand slightly for easier installation onto the spindle.

Spindle Bearings

Installation Steps

Align the Bearing: Align the bearing with the spindle to ensure it slides on straight without tilting or skewing.

Mount the Bearing:

Press Fit: For bearings that require a press fit, use a hydraulic press or a suitable fixture to press the bearing onto the spindle. Apply pressure evenly and ensure the bearing is pressed in squarely to avoid misalignment.

Slip Fit: For bearings that are heated and then slipped onto the spindle, ensure that the bearing is placed quickly and precisely while it is still expanded from heating.

Cooling and Seating: Allow the bearing to cool and contract onto the spindle, ensuring a tight fit. Verify that the bearing is seated properly against any shoulders or stops on the spindle.

Securing the Bearing

Retaining Mechanisms: Use retaining nuts, lock washers, or other retaining mechanisms as specified by the manufacturer to secure the bearing in place. Torque the retaining nuts to the specified value using a torque wrench.

Axial Preload: Set the axial preload on the bearings according to the manufacturer’s specifications. This may involve adjusting spacers or using preloading tools.

Installation into Housing

Housing Alignment: Ensure the spindle and bearing assembly is aligned with the housing. Misalignment can cause premature bearing failure.

Inserting Assembly: Carefully insert the spindle and bearing assembly into the housing, ensuring that it is aligned and does not damage the bearing or housing.

For more detailed information about the installation method of machine tool spindle bearings, please click here: https://www.lkwebearing.com/news-center/machine-tool-spindle-bearing-installation.html